Monday, December 26, 2011

"the Christmas story" :)

first, please press the "pause" button on my glorious Christmas tunes playlist on the right side.

second, watch this video.

my friend kimberly posted this video a while ago, but i just watched it for the first time tonight!  ABSOLUTELY PRECIOUS!!!! :)  i believe at the heart of every american is some kind of slight, to moderate, to severe OBSESSION with foreign accents of any kind......  so, watching small children from new zealand act out AND tell their version of the Christmas story is no exception; yep, it absolutely stole my heart. and i think their little new zealand accents didn't hurt a bit in that heart-thieving process. :)  ENJOY! :)


Sunday, December 25, 2011

sausage gravy & biscuits

Christmas comes once a year.
and certain meals probably should, too, if we are concerned about our colons (oh, and you can count on it that we are, thanks to the MD mister of the house).
so therefore... when we go to church and don't get to bed until the wee hours of the middle of the night... and sleep in until very late on Christmas morning.... you can bet your bottom dollar i'm gonna make a hearty, special, this-is-kind-of-bad-for-us-but-SO-delish kind of meal.

homemade sausage gravy and biscuits. BOOM.

homemade baking powder biscuits
makes about 4-8 biscuits (depending on how large you cut them) 
recipe adapted from my beautiful great-aunt joyce :)
***the only difference in our recipes: hers called for shortening (but i try with all my might NEVER to purchase crisco/lard/the likes... so i used butter. still turned out GREAT in my opinion) ;)

ingredients:
2 cups flour
1 Tablespoon baking powder
1/2 teaspoon salt
5 Tablespoons cold butter
2/3 cup milk
2 Tablespoons sugar (optional, or add more if you want super-sweet shortcakes)

directions:
sift together flour, baking powder, salt, and sugar (if you used any; I used a scant 2 tablespoons' worth today).  cut in butter until the mixture resembles a coarse meal (i actually don't own a pastry cutter or a food processor... so i used my hands. it actually worked out even better than i thought it would!!).  add milk until the dough pulls together & looks like you can knead it (i used 2/3 cup, but i added it 1/3 cup at a time).
turn out dough onto lightly floured surface, and roll out or pat out with hands to 1 inch in thickness.  cut out biscuits with your favorite cutter; i don't own biscuit cutters SO i took paula deen's advice and used an empty tin can! (she says the sharper your cutting instrument, the better--- that's why she doesn't use a regular drinking class to cut out biscuits).  bake at 400 degrees F for 12-15 minutes or until golden brown.  butter the tops of them when they come out of the oven for flavor and loveliness. :) 
note: for my first attempt at making biscuits... i thought these puffed up SO nicely!  you'll love them.  :)

sausage gravy
     ***SORRY i didn't follow a recipe for this..... so i can't give you amounts... but i can tell you what i did (hopefully with clarity and brevity for the sake of your sanity). :)

ingredients:
sausage
butter (if needed)
flour
milk
salt and pepper

directions:
1) cook sausage until well-done in skillet. (i had bob evans sausage links in my fridge, so i de-cased and used them).
2) turn off the heat; remove sausage from pan (put on plate & save it for the end).
3) if you have enough sausage grease in your pan, feel free to add the flour right to that and get cookin' on your roux.  however, i have no CLUE where my sausage grease was... my pan was dry as a bone.  therefore, i had to add about 3-4 tablespoons of butter to my pan to give it a little somethin--- then i added.. oh... probably 2-3-4? tablespoons of flour to make the roux and let it cook for probably 2-3 minutes on low to medium heat.
4) pour in milk... i just eyeballed it.  maybe i added... ohh... 2 cups' worth? maybe 2 and 1/2 cups?  maybe even 3.  continue to whisk constantly, leaving your heat on about medium.  you want your gravy to simmer and cook-- but NOT boil.
*note* keep scraping the bottom of your pan throughout this whole process: all the good, yummy bits at the bottom of the pan are your BFFs when making sausage gravy. :)
5) let the gravy thicken up as you continue to whisk it, and when it is thick enough to coat your spoon (slash, thick enough for your liking... you can add your sausage back in).
**6) if your gravy isn't thickening up, you can create some make-shift roux in your microwave (I did this today and it worked out just fine!).  i microwaved a little more butter, then added some flour and stirred it into the melted butter--- then i put that roux mixture back into the microwave for several more seconds to cook it a little--- then i added it to the simmering gravy.  this really helped my gravy a lot; it just wasn't as thick as i wanted and it was the only thing i could think of to thicken it more that would for SURE not ruin it or make it lumpy.
7) remember to taste along the way, adding salt & pepper as needed! :) 

enjoy with one of those fluffy, pillowy biscuits!!!


if sausage gravy & biscuits were as good for me as a big salad... i would honestly eat it at least once a week. :)


Saturday, December 24, 2011

christmas dinner rolls

my sweetie and i were invited to spend Christmas with some sweet friends from our church family; when i asked the hostess what i could contribute, she assigned me to mashed potatoes and rolls.  i had originally planned on baking some frozen rolls (that i purchased with a coupon-- yay!)... but things changed.
as any wife/husband of an md knows, the hours can be sooooo lonnnnggggg.
just like kevin mccalister, i need stuff to do while home alone so i didn't go nuts. (as well as praying harry and marv NEVER show up at my door: yikes!).  i decided the project i needed was to make some special, homemade rolls for this special Christmas dinner.

i researched several places-- from cookbooks my grandmother had given me, to obscure websites... and actually, decided to make emeril lagasse's cloverleaf dinner rolls.  even though there wasn't a picture shown with this recipe, i chose it for three reasons:
1) it didn't need to rise overnight (i didn't have that kind of time)
2) i already had all the ingredients in my kitchen
3) it only made 12 rolls, rather than the 24 or more of other recipes (PERFECT number for a small group gathering) 

my sweet husband eventually DID get home from work (praise the LORD) and we made it to dinner semi-on-time (which let's be real, that's my usual). and i think these rolls went over WELL :)  they are a little sweet but not so much that you bite into one thinking, "sheesh are these dessert?"  they paired nicely with everything from the turkey and stuffing to the homemade red raspberry preserves and honey-cinnamon butter. :)  ENJOY!  and merry, merry Christmas.  ;)

Cloverleaf Dinner Rolls
Emeril Lagasse via food network website

total prep time: about 30-45 minutes
total rise time: about 3 hours (in 2 hr. and 1 hr. increments)

Ingredients:
1 1/4 cups milk
1/2 cup plus 2 teaspoons butter
3 tablespoons nonfat dry milk
3/4 cup plus 1/2 teaspoon granulated sugar
1 teaspoon salt
1 (1/4-ounce) package active dry yeast
2 eggs, lightly beaten
4 1/2 cups all-purpose flour
Directions: 
In a small saucepan (medium heat), combine the milk, 1/4 cup of the butter (half a stick), dry milk, 3/4 cup sugar and the salt and cook, stirring frequently, until the butter is melted and the sugar has dissolved, about 2-3 minutes. Remove from heat, set aside to cool down to lukewarm. (when you turn the heat off this milk/sweet mixture and are letting it cool-- go do something else for 10 minutes before you get started on the next part; don't move on till your milk mixture is cooled off a little).
In a large mixing bowl, dissolve the yeast and remaining 1/2 teaspoon of sugar in 1/4 cup of warm water (110 degrees F). Add the beaten eggs; stir to combine. Set aside until foamy, (about 10 minutes). Add the milk mixture to the yeast mixture; stir. Using a wooden spoon, add the flour 1 cup at a time. The dough will be quite stiff and somewhat sticky (but that's okay!). If the dough gets too stiff to stir with a spoon, use your hands to mix.  **some of the reviews on emeril's recipe were complaining that the dough was too sticky and they needed to add flour; this was NOT my experience. for me, 4 1/2 cups of flour was *PERFECT*.
Lightly grease the inside of a big bowl with 1 teaspoon of the remaining butter. Transfer the dough to the greased bowl and turn it to coat the dough. Lightly grease a piece of waxed paper or plastic wrap with the remaining teaspoon of butter and use it to cover the bowl. Set aside in a warm place until doubled in size, at least 2 hours.

************************
2 hours later: Melt the remaining 1/4 cup of butter (the other half of the stick!) in a microwave-safe bowl and set aside to cool a little.  Turn the dough out onto a lightly floured surface and knead until smooth and elastic, about 2-3 minutes.


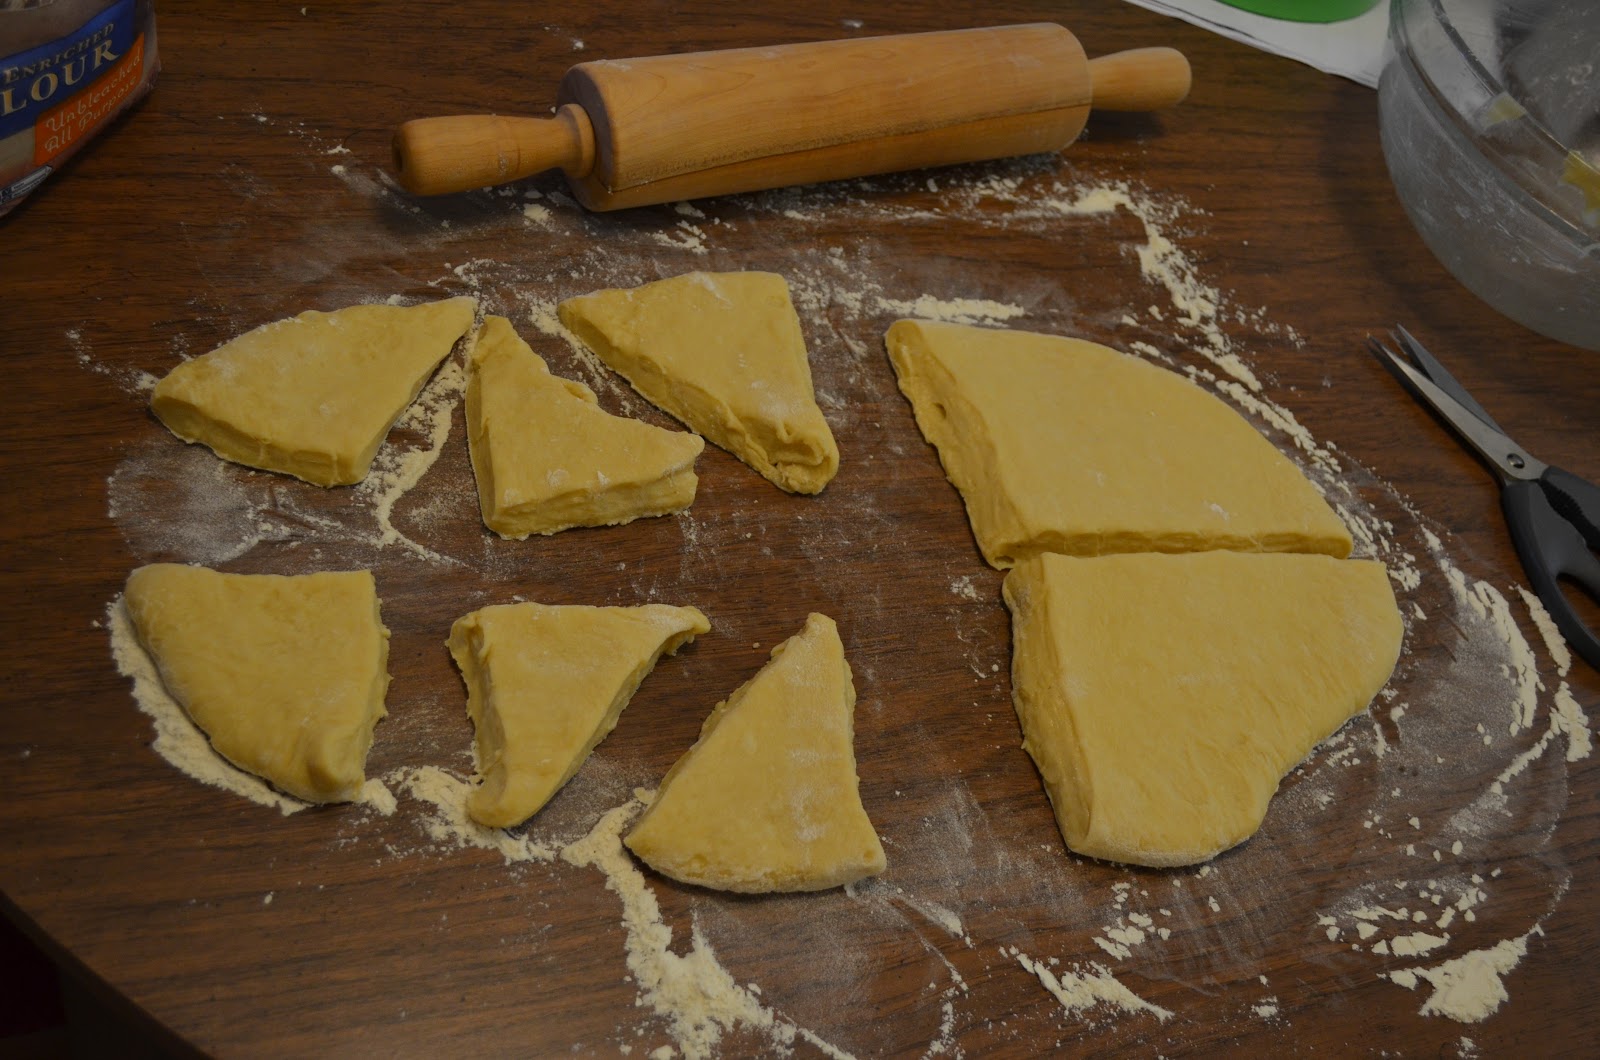
Using a lightly floured rolling pin, roll the dough to a thickness of 1/2-inch. 


Using a sharp knife (I used kitchen scissors cause i didn't want to hurt the table!!), cut the dough into 36 equal pieces.  (look at my pictures for how i did this! -- i did 4 quadrants out of my big circle... then 3 pieces from each quadrant and each piece was divided up into 3 smaller pieces).  


at this point, i took each one of the smaller triangles on the left side, and cut them into 3 pieces each (and obviously repeated the process on the right side)
Tuck the cut edges of each piece under so as to form a smooth round ball of dough.  Place 3 balls of dough side by side into each well of a muffin tin.  Using a pastry or basting brush, lightly brush the top of each roll with the melted butter. Cover with plastic wrap and set aside in a warm, draft-free area until doubled in size, about 1 hour.

******************
1 hour later......

Preheat the oven to 350 degrees F. 
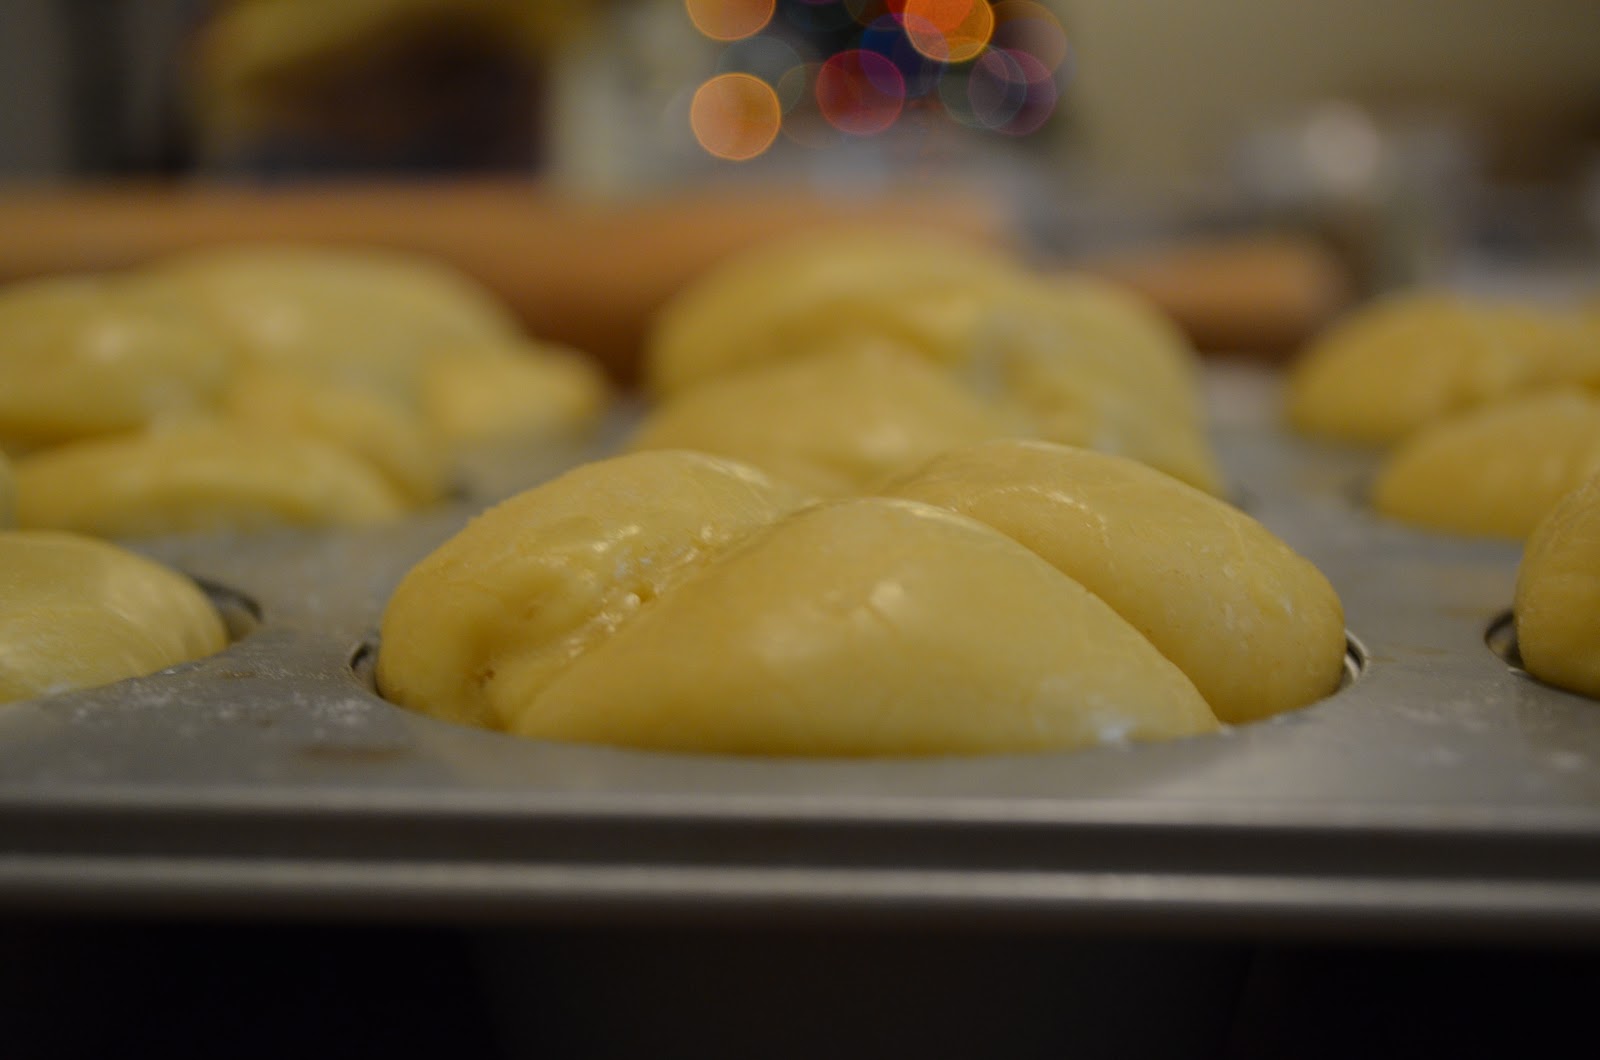
check out these pictures of the little buttered rolls after their final rise. 
aren't they gorgeous? :)


Bake the dinner rolls in the center of the oven until golden brown and puffed, about 18 to 20 minutes.  When the rolls come out, baste them with a little more of the butter from earlier (they looks so pretty when they glisten with butter!) :)

Be sure to serve the rolls while they are still warm with your favorite spreads. (these were served with homemade red raspberry preserves that i canned last fall, as well as a homemade honey-cinnamon butter that I made from a stick of softened butter, honey, cinnamon, a little sugar, and a tiny pinch of salt).  :)

sorry the picture isn't better quality-- but they were DELICIOUS and looked kinda pretty, too! :)

Friday, December 23, 2011

homemade tomato soup & toasted cheese

i didn't grow up enjoying tomato soup. it wasn't till college when my dear roommate, kelly, introduced me to the magic of tomato soup + toasted cheese. [or you can say grilled cheese, but whatevs, my mother says "toasted" and i like her, so i say "toasted" too.] 

then i moved overseas, and in italy, there aren't an abundance of canned soups/pre-made things, so i had to learn how to do things from scratch.  it's funny how a girl can move from rural midwestern towns to ROME and it is there, that she has to learn how to be a pioneer woman. ironic.

anyway!  i canned TONS of tomatoes last fall (lo & behold- a pioneer woman skill that i actually learned HERE [this fall!] and not in my time overseas!!) ;)  enjoy this recipe i made one night for my sweet buddy and I--- based on memories from the tomato soup we used to make in Rome. :)

tomato soup + toasted cheese
serves 2 with leftovers. :)

ingredients:
1 can low-sodium chicken broth
2 pints home-canned tomatoes (32 ounces)
***OR*** 2 cans, 15 oz. each, of store-bought canned tomatoes (you could mix it up even- and do one crushed + one diced... or one crushed + one whole (and hand crush them yourself)
2-3 Tbsp. butter
diced sweet Spanish onion (i used a little over 1/3 cup)
2-3 cloves garlic, minced/crushed
salt, pepper, oregano, parsley, thyme
optional: half-and-half or cream for serving


chop onions and garlic.
get your tomatoes ready.  not to toot my own horn... but aren't mine pretty? :)

seriously, look at that RED! :)
anyway-- saute' your onion & garlic in that glorious butter. DO NOT use olive oil here.. if tomatoes were best actor of this dish... butter would be best supporting actor. don't substitute it!  add your salt & pepper. let the onions get translucentish.

THEN, add in your tomatoes, other spices--- and let it all melt together on a low simmer.  I used my immersion blender to blend a few of the huge chunks (since i canned whole tomatoes), but do what you want depending on how chunky/unchunky you like your soup. heck, you could puree' the whole thing if that's what floats your boat---- but i like chunks, so i don't.

serve with toasted cheese--- whatev's kind you want.  go for it and buy some crusty pane di grano duro or ciabatta with Gruyere if you're feeling fabulous and expensive--- but if you're feeling cheap/wanting to be 5 years old again--- go for your favorite multigrain sotre-bought loaf and classic American Kraft cheese slices. :)  that's what we did and it made our night!  :)  OH- and we DID stir in some half-and-half into our bowls--- but i don't like to stir it in the whole pot-- i think it's unneccessary.  to each his/her own; put it on the table and let your guests choose how creamy they like it. :)  buon appetito!

Thursday, December 22, 2011

grandma vera's dutch apple pie


every grandma has "her best" pie/cookies/way to cook a roast/whatever.
this is my sweet buddy's grandma's best. 
enjoy. :)

grandma vera's dutch apple pie
pie ingredients:
1 unbaked pie crust
about 6 cups apples, peeled & sliced (this is about 6-8 apples, depending on how big they are)
3 Tbsp. butter, melted
3/4 cup granulated sugar
1/2 tsp. cinnamon

crumbly topping ingredients:
3/4 cup flour
1/2 tsp. cinnamon
1/3 cup softened butter
1/3 cup brown sugar

Place sliced, peeled apples in a large bowl. Pour melted butter over apples, stir in sugar and cinnamon.  Place apple mixture in unbaked pie crust. Mix the topping ingredients together until crumbly (you might give yourself a good 5 minutes to really get everything incorporated and crumb-like).  Gently pour crumbs over top of apples, sprinkle with a little extra cinnamon. :)  Bake at 425 degrees F for 20 minutes, THEN turn down the oven to 350 degrees and bake for 30 more minutes.


YUM!!  Enjoy all by itself-- (it can stand alone!) OR with vanilla ice cream and perhaps a mug of coffee. :)

Wednesday, December 21, 2011

molasses cookies

ok friends, i'm way behind on blogging. sorry. :(  
my new year's resolution shall be to blog at least once a week--- i shall try to keep it up (we'll see how it goes. thank the Lord for grace, right?) :)

i'm going to blog my brains out and post a few recent recipes that have melted my heart. first up: molasses cookies.  what says "merry Christmas" like some sweet and spicy cookies right out of the oven? :) idk.  enjoy. <3

Molasses Cookies
recipe adapted from some girl's grandma's friend: Fanny Farmer. :)
  • 3/4 cup melted butter
  • 1 cup granulated sugar
  • 1/4 cup molasses
  • 1 egg
  • 2 cups flour
  • 2 teaspoons baking soda
  • 1/2 teaspoon salt
  • 1/2 teaspoon ginger
  • 1/4 teaspoon pumpkin pie spice (i did this cause i don't own ground cloves)
  • 1 teaspoon cinnamon
  • Extra sugar for rolling


Combine butter, sugar, molasses and egg in large mixing bowl

Combine flour, baking soda and spices in medium bowl; add flour mixture to butter mixture and stir until well combined.  Put in refrigerator until dough has hardened.
sorry this is sideways - just deal with it - but i wanted to show you my FAVORITE fair trade unsulphured organic molasses. YUM. (i got it at meijer) :)
Scoop out dough (I used a 1-inch cookie scoop) and roll into 1 inch balls


Roll balls in sugar and place on cookie sheet, well-spaced apart.
Press down slightly on cookie dough with flat bottom of a glass.
OR you can leave them un-sugared if you want to ice them later. :)

YAY! aren't they pretty!? :)  Bake for 8-10 minutes at 375 degrees F.
forgive my hasty/messy frosting job- but trust me, they were delish. :)

Friday, November 11, 2011

beef barley lentil soup

i confess: not sure if this is my all-time favorite soup recipe..... but nevertheless it was good and, yeah, i'd make it again. why not. maybe i am just not so crazy about it personally, but i know there are people out there that would go nuts over it-- my mother, being one for sure.

i took the recipe for Taste of Home's "Beef Barley Lentil Soup" and modified it here and there- making changes and adding in stuff i wanted.
*caution* - it made a HUGE pot. :) like we ate it for supper two nights, bud ate it for breakfast on the 3rd day (yes, breakfast, lol)... AND i still froze two quart-sized baggies.

ingredients:
1.25 pounds stew beef (i think what i bought was chuck, cut up in chunks)
1 medium onion, chopped (i used 1/2 a HUGE giant sweet onion)
4 *big* red potatoes, diced in small chunks (or enough potatoes to make ~2 cups)
3 stalks celery, diced
3 carrots, peeled & diced
2 cloves garlic, minced
1 cup dried lentils, rinsed
1 cup barley
64 oz. reduced-sodium beef broth (two 32 oz. cartons)
1 large can (28 oz) whole peeled tomatoes 
fresh spinach leaves, washed and torn (i used probably 1 to 1/2 cup?)
1/2 to 1 tsp. thyme
1 bay leaf
Oil for the pot (~2 to 3 tbsp.)
Lawry's seasoned salt
Worchestershire sauce (a dash)
pepper


directions:


in your biggest soup pot, add the oil and let it heat up a little. add meat; make sure to leave room for the pieces. overcrowding leads to poor browning. and you WANT your beef pieces to brown... browned meat tastes GOOD. 


turn the pieces on all sides to try to achieve as much browning as possible.  season beef with Lawry's and pepper-- and a few dashes of Worchestershire sauce (cause let's face it: W-shire sauce makes everything more delightful). :)

move your pieces and put them on a plate while you brown the other ones.  when you're done, move all pieces to the plate (successfully creating a "meat mountain"). :)


i got excited/was working hard on these next few steps, so i forgot to take pictures.. sorry.  now you need to add in your onions, carrots, celery, (a mirepoix, if you want to be french) :).. and saute' them in all the oily goodness left by the beef-- scraping the pan as you go. Heck, here i added a Tablespoon of butter, too... i couldn't resist. ;)  Add in your garlic after you let your mirepoix cook for a couple minutes. season this layer with a little more salt and pepper; and the thyme-- however much you want. i probably used a tsp.  **and don't forget to add in the celery leaves, too, if they came on the stalks-- they are soo good!


put the stew beef back in the pot. add the potatoes, and open your can of tomatoes, adding the juice, and carefully plopping out one tomato into your hand at a time, crushing it and adding to the pot.

stir everything together, add the bay leaf, taste, and season accordingly.
bring to a boil... let cool till everything is tender (especially test the harder things in the soup: the carrots, lentils, and potatoes)


when you're getting close to wanting to serve the soup, throw in your handful or two of torn spinach leaves, and let them cook for 5-10 minutes or so to wilt the leaves.

when everything is done, remove the bay leaf and serve in bowls with your favorite bread of choice (i made biscuits... from a can. who wants to do homemade after all of that chopping and cleaning? come on. if you know such people, send them to my house to also do the dishes, if they're that ambitious.) :)

Saturday, November 5, 2011

a walk in the park

bud and i took a walk in the park on wednesday; it was GORGEOUS.  ptL we got to experience the warmth of the sun and some of (the remaining!..) fall colors before the wind blows all the trees leaves away into the winter bareness.

enjoy a few pictures (taken with our new camera!... which i still don't know how to use, lol... but i did my best). :)  enjoy!


lovely colors!


i absolutely **love** a river in a park. :)
i love how these two trees are growing together... AWWWW.

a fully uprooted fallen tree. whoa.
the flood plain!
oh, hello there. a 10(?)-point-buck!
sweetheart.

the reason he was hanging around.... :)
look at this sweet, younger little mister. doesn't he have sweet eyes? :)