Dear friends... Thank you for your patience with me. I haven't blogged in well over 2 months.
My Mom was in a horrible car accident and suffered many injuries, including a severe brain injury. All that to say, my life has obviously had other priorities than blogging. Please join me in praying that the Lord will give my Mom a full and complete recovery!
Thanks, also, for not giving up on my little blog--- I'll continue to post! In fact, I think I'm gonna do a couple recipes right now. ;)
Saturday, March 31, 2012

Wednesday, January 25, 2012
spinach-ricotta manicotti
i think i've always had this perception that stuffed pastas were sooo fancy, and therefore, must take a LOT of time to make.
this is definitely not true! :)
thanks to this super-easy, super-fast recipe, i made stuffed pasta for my 1st time tonight (and oh baby, was it good!) :) :) :)
thanks to this super-easy, super-fast recipe, i made stuffed pasta for my 1st time tonight (and oh baby, was it good!) :) :) :)
Spinach-ricotta Manicotti with Vodka Sauce

ingredients:
- 8 manicotti pasta shells
- 1 teaspoon olive oil
- one 15-ounce container ricotta cheese (I used lowfat!)
- 1/2 cup grated Parm
- 1/2 to 1 teaspoon finely grated lemon zest (choose your measurements; make it how you like it)
- one 10-ounce package frozen spinach, thawed and squeezed **dry**
- 2 cups whatever red pasta sauce you like (NOTE: I used Vodka Sauce and it was UHH.MAY.ZING)
- more Parm on the top, before you stick it in the oven (perhaps 1/2 cup?)
***Confessions*** ***Read before starting............. :)
*the "olive oil" is totally just for greasin' up your baking pan. I totally skipped this and used "Pam" to spray my dish
*i NEVER use the green plastic can of "Kraft: Grated Parmesan cheese" when I cook--- I always, always, always use REAL Parmeggiano-Reggiano from ITALY. However..... this recipe called for a LOT and I knew Parm didn't have to be the front-runnin' show-stopper of the dish. SO, being on a *budget*!!... I broke down and bought the can o' kraft. PLEASE don't be offended by my soap-box statements if you normally use this for your Parm... i just lived in Italy for 2 years and it's hard for me to use that green can for everyday sprinkling purposes when the real stuff is so DIVINE. but for this recipe, the green can is PERFECT. ;)
*with the red sauce-- i DID use Vodka Sauce. Emeril Lagasse's Vodka Sauce from the grocery store, actually. ...AND to be honest- I only had about half a jar left in the fridge----- SO i had a tiny 8-ounce can of plain Tomato Sauce that I mixed with the leftover Vodka Sauce... and VOILA---- **the perfect** sauce to brighten up the spinachy-cheesy manicotti. :)
Directions
Preheat oven to 375 degrees. In a large pot of boiling *salted* water, cook pasta shells according to package instructions (mine were Barilla brand, I cooked them for 7 minutes! PERFECT).
Preheat oven to 375 degrees. In a large pot of boiling *salted* water, cook pasta shells according to package instructions (mine were Barilla brand, I cooked them for 7 minutes! PERFECT).
While the pasta is cooking, in a medium bowl, combine ricotta, 1/2 cup Parm, and lemon zest. Stir in spinach (that was squeezed dry!!!) and add salt & pepper (to taste!). Carefully scoop filling to a quart-sized plastic bag. Twist and squeeze bag so filling is in one corner, and snip a hole in one of the corners (probably 3/4 to 1 inch).
When your pasta timer goes off (again, mine was only 7 minutes-- even *before* al dente *but* this was because they finish cooking in the oven) :) ... drain the pasta well and arrange in a single layer in a baking dish (I used one that was probably... 9" x 10"? something weird like that but it was the PERFECT size-- you could use a square pan and it'd probably be great!)
Pipe filling into both ends of each pasta shell. (You might have to get your fingers in there to help it along! And if you notice that the hole in your bag is too small for some of the larger spinach pieces to pass through--- just make it a little bigger!) :) Put the stuffed shells back in your baking dish, until all are filled.
Pour whatever red sauce you are using evenly over the manicotti and top with more Parm (I just sprinkled mine from the jar... Martha Stewart suggests 1/2 cup.). Bake until sauce in center of dish is bubbling and Parmesan is browned in spots, about 30 minutes. Let sit 5 minutes before serving.
BUON APPETITO!!!! it's WONDERFUL! <3 :)
source: Martha :)
Sunday, January 22, 2012
showstoppin' guac
my husband looooves guacamole. we can go through phases in this house where we eat guac by the bowl-full.
where we live, there are a few ways to get great guac: you can buy freshly-made, really good guac at a local grocery store for $9.99 a pound (YIKES)... pay a hefty amount for some of Chipotle's awesome guac... OR you can make it yourself-- for WAY cheaper. Obviously, you know what I opt to do! = the homemade route! :)
here are the ingredients needed for show-stoppin guac. in all of my experimenting, i've used a huuuuge spectrum of different types of tomatoes, onions, etc.. {one time, i even tried the "Florida avocados" you can sometimes find at the grocery store-- they are usually bigger than Hass ones and instead of the bumpy, dark skin, they have a shiny, green skin} ... **but** the list below are my *fave* ingredients which, after alllll my trial runs, these (in my opinion) are the best for making the most legit guac this side of the border.

ingredients:
{and remember, type matters!}
- Hass avocados
- Roma/Plum tomatoes
- Red onion
- Fresh jalapeno (if desired for spiciness; in my opinion, this is 1 thing you can leave out)
- fresh garlic cloves
- Lime juice/and or zest
- Fresh cilantro leaves
- Salt
- Black pepper
example amounts I used from one little batch I just made:
2 Hass avocados {for an instructional video on how to cut an avocado, here's a great & quick one!)
1/2 fresh Roma tomato, diced (it was pretty big, if it was smaller, I probably would have used the whole thing)
1 Tbsp. (?) Red onion
1 garlic clove, finely minced
2-3 Tbsp. chopped fresh cilantro leaves
a few squeezes of lime juice (maybe 1 tsp?)
several pinches of salt
a few cranks from the pepper grinder
*i left out the jalapeno today; i had a weird stomachache last night and didn't wanna add any spicy to my life today :)..... but if you want some, obviously just chop finely, remove the seeds, and add what you want
fiddle with the amounts, and enjoy this DELISH combo of ingredients to make the PERRRRFECT, show-stoppin' guac!!!! :)
Monday, January 16, 2012
blueberry buttermilk cake
i grew up watching my dad drink buttermilk. he always tried to get me to drink some, but one whiff of the sour/weird/this-smells-like-bad-milk smell always sent me running the other direction.
as i grew older, however, i learned the joys of at least cooking with buttermilk. our family's cutout Christmas cookie recipe uses buttermilk, so do my grandma's famous amish sugar cookies (which are like pillows of melt in your mouth MAGIC... golly, i should do a post on those!).
anyway, i had some leftover buttermilk in my fridge from cooking over the holidays, and i am craving something delicious/want something yummy in the morning for breakfast, so i decided to make something i found thanks to pinterest (my new potential time-waster/but trying hard to have tons of self-control!!! lol). i modified the recipe though, to include wayyy more buttermilk, less sugar, and maple syrup (if this is a breakfasty type cake of COURSE it needs maple syrup!!!!!!) ;) hope you enjoy this recipe :)
blueberry buttermilk cake
adapted from alexandra cooks
ingredients
1/2 cup butter, room temp. (aka 1 stick)
1-2 tsp. fresh lemon zest (i zested most of a smallish lemon)
3/4 cup granulated sugar
2 Tablespoons maple syrup
1 egg
1 teaspoon vanilla
2 cups flour (separated into 1/4 cup flour and then the rest: 2 and 3/4 cups flour)
1 pint fresh blueberries (rinsed and drained)
2 teaspoons baking powder
1/2ish teaspoon salt
1 scant cup buttermilk (shake it WELL before you pour it!)
1-2 Tablespoons of demerara sugar (the fancy "sugar in the raw"/natural sugar type)
preheat oven to 350 degrees F., and butter an 8x8 inch square pan (or whatever smallish pan you want to use).
 cream together the butter, lemon zest, and sugar in a large bowl. add in maple syrup, beat.

beat in egg and vanilla.
in separate small bowl, mix the 1/4 cup of flour with the blueberries; toss to coat them. set aside.

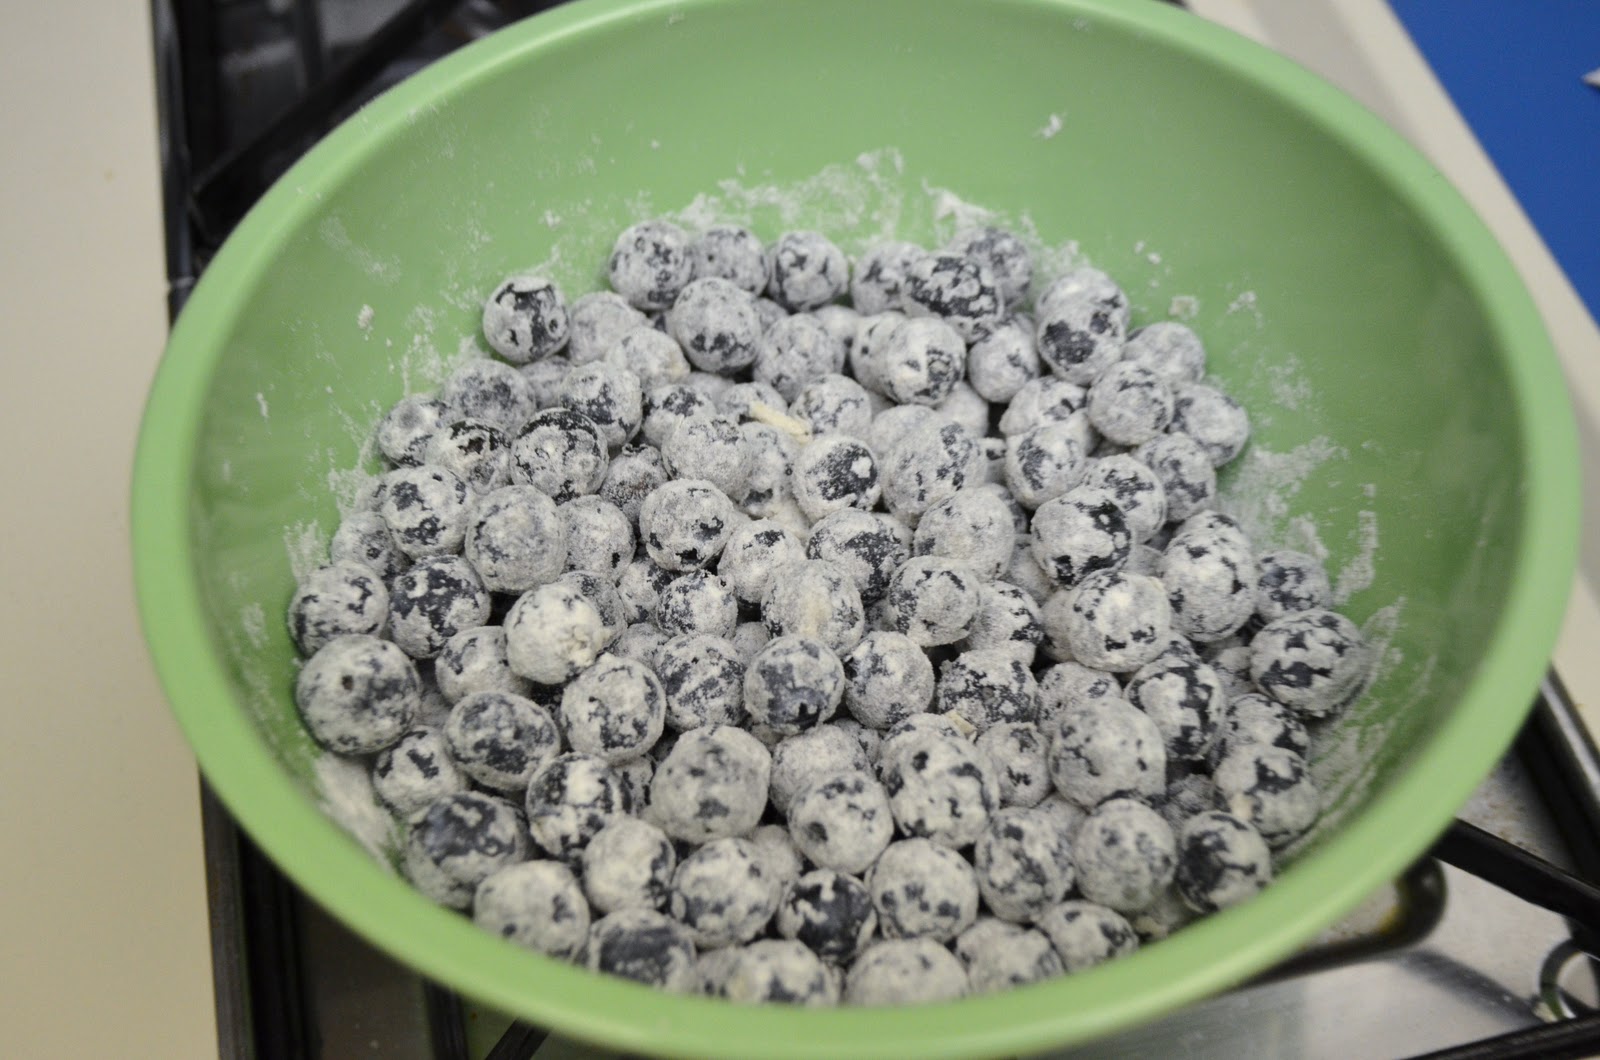
in a different small-ish bowl, sift together the rest of the flour (2 and 3/4 cups) with the baking powder and salt.
incorporate the flour mixture and buttermilk into the big batter bowl by alternating each item.
**note** the original recipe called for 1/2 cup buttermilk, so start there to be safe. when my batter was completed, i thought it looked too thick, so i felt the freedom to add more. the reason i wrote "scant" is cause, in my typical style (which is SO not appropriate for baking!!) i just poured the extra buttermilk out of the jug and didn't measure it. wah wah. BUT i bet i poured in.. oh.. at least another 1/4 cup.. maybe another 1/2 cup? (on top of the 1/2 cup that was already in the batter)-- so that's why I said SCANT cup. just pour to your liking. feel the freedom. (baking doesn't always have to be serious!...... if it HAD to be.... i wouldn't do it.) :)


when your batter is completed to your liking, gently fold in your flour-dusted blueberries.


pour batter into your prepared pan and sprinkle the whole cake with the demerara sugar. (if you don't own demerara sugar, NOW IS THE TIME to get some!! soooooo worth having in your kitchen!! (i buy it for our little sugar bowl---- it's one of my fave simple things to sweeten coffee [and tons of other stuff]) :)


pop in the oven for...... okay, again, i have failed----- i didn't set a timer and didn't pay attention as to when exactly i put the cake in the oven.... but the original recipe called for 35 minutes at 350-- so start there, and just check it with a toothpick for doneness. but fyi: i bet mine cooked for more like 45-60 minutes.. yeah.

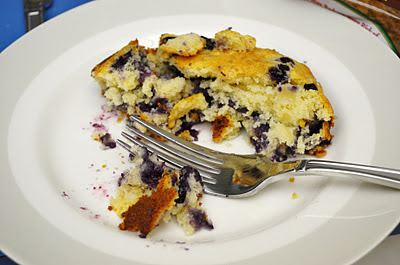 |
| sorry it's all crumbly-- it was still SUPER warm when i cut this piece; i was just soooo hungry i couldn't resist! i promise if you let it cool your piece won't fall apart like this. :) |
Saturday, January 14, 2012
fun with Legos :)
my dear husband, being the "doctor" referred to in this blog's title, received a Lego set for Christmas from my family because we thought he needed something FUN and not "serious" to think about. you know: a BREAK!
enjoy these photos from our recent evening of putting the Star Wars spaceship together. (it was my **first time** putting together Legos, and SO FUN!) :)
 |
| what a fun storm trooper-- cape and all |
 |
| he's just loving this. :) |

 |
| it's so crazy how these kits come with such neat figurines/Lego people/whatever they're called :) |

 |
| oh, hello there, Pity Jane :) |
 |
| ship, in-progress |
 |
| some of the pieces were sooo small |

 |
| almost done! |
 |
| snapping "obi-wan" into his seat, lol |
 |
| finished!!! ---a truly FUN date night :) |
Monday, December 26, 2011
"the Christmas story" :)
first, please press the "pause" button on my glorious Christmas tunes playlist on the right side.
second, watch this video.
my friend kimberly posted this video a while ago, but i just watched it for the first time tonight! ABSOLUTELY PRECIOUS!!!! :) i believe at the heart of every american is some kind of slight, to moderate, to severe OBSESSION with foreign accents of any kind...... so, watching small children from new zealand act out AND tell their version of the Christmas story is no exception; yep, it absolutely stole my heart. and i think their little new zealand accents didn't hurt a bit in that heart-thieving process. :) ENJOY! :)
Sunday, December 25, 2011
sausage gravy & biscuits
Christmas comes once a year.
and certain meals probably should, too, if we are concerned about our colons (oh, and you can count on it that we are, thanks to the MD mister of the house).
and certain meals probably should, too, if we are concerned about our colons (oh, and you can count on it that we are, thanks to the MD mister of the house).
so therefore... when we go to church and don't get to bed until the wee hours of the middle of the night... and sleep in until very late on Christmas morning.... you can bet your bottom dollar i'm gonna make a hearty, special, this-is-kind-of-bad-for-us-but-SO-delish kind of meal.
homemade sausage gravy and biscuits. BOOM.

homemade baking powder biscuits
makes about 4-8 biscuits (depending on how large you cut them)
recipe adapted from my beautiful great-aunt joyce :)
***the only difference in our recipes: hers called for shortening (but i try with all my might NEVER to purchase crisco/lard/the likes... so i used butter. still turned out GREAT in my opinion) ;)
ingredients:
2 cups flour
1 Tablespoon baking powder
1/2 teaspoon salt
5 Tablespoons cold butter
2/3 cup milk
2 Tablespoons sugar (optional, or add more if you want super-sweet shortcakes)
directions:
sift together flour, baking powder, salt, and sugar (if you used any; I used a scant 2 tablespoons' worth today). cut in butter until the mixture resembles a coarse meal (i actually don't own a pastry cutter or a food processor... so i used my hands. it actually worked out even better than i thought it would!!). add milk until the dough pulls together & looks like you can knead it (i used 2/3 cup, but i added it 1/3 cup at a time).
turn out dough onto lightly floured surface, and roll out or pat out with hands to 1 inch in thickness. cut out biscuits with your favorite cutter; i don't own biscuit cutters SO i took paula deen's advice and used an empty tin can! (she says the sharper your cutting instrument, the better--- that's why she doesn't use a regular drinking class to cut out biscuits). bake at 400 degrees F for 12-15 minutes or until golden brown. butter the tops of them when they come out of the oven for flavor and loveliness. :)
note: for my first attempt at making biscuits... i thought these puffed up SO nicely! you'll love them. :)
sausage gravy
***SORRY i didn't follow a recipe for this..... so i can't give you amounts... but i can tell you what i did (hopefully with clarity and brevity for the sake of your sanity). :)
ingredients:
sausage
butter (if needed)
flour
milk
salt and pepper
directions:
1) cook sausage until well-done in skillet. (i had bob evans sausage links in my fridge, so i de-cased and used them).
2) turn off the heat; remove sausage from pan (put on plate & save it for the end).
3) if you have enough sausage grease in your pan, feel free to add the flour right to that and get cookin' on your roux. however, i have no CLUE where my sausage grease was... my pan was dry as a bone. therefore, i had to add about 3-4 tablespoons of butter to my pan to give it a little somethin--- then i added.. oh... probably 2-3-4? tablespoons of flour to make the roux and let it cook for probably 2-3 minutes on low to medium heat.
4) pour in milk... i just eyeballed it. maybe i added... ohh... 2 cups' worth? maybe 2 and 1/2 cups? maybe even 3. continue to whisk constantly, leaving your heat on about medium. you want your gravy to simmer and cook-- but NOT boil.
*note* keep scraping the bottom of your pan throughout this whole process: all the good, yummy bits at the bottom of the pan are your BFFs when making sausage gravy. :)
5) let the gravy thicken up as you continue to whisk it, and when it is thick enough to coat your spoon (slash, thick enough for your liking... you can add your sausage back in).
**6) if your gravy isn't thickening up, you can create some make-shift roux in your microwave (I did this today and it worked out just fine!). i microwaved a little more butter, then added some flour and stirred it into the melted butter--- then i put that roux mixture back into the microwave for several more seconds to cook it a little--- then i added it to the simmering gravy. this really helped my gravy a lot; it just wasn't as thick as i wanted and it was the only thing i could think of to thicken it more that would for SURE not ruin it or make it lumpy.
7) remember to taste along the way, adding salt & pepper as needed! :)
enjoy with one of those fluffy, pillowy biscuits!!!


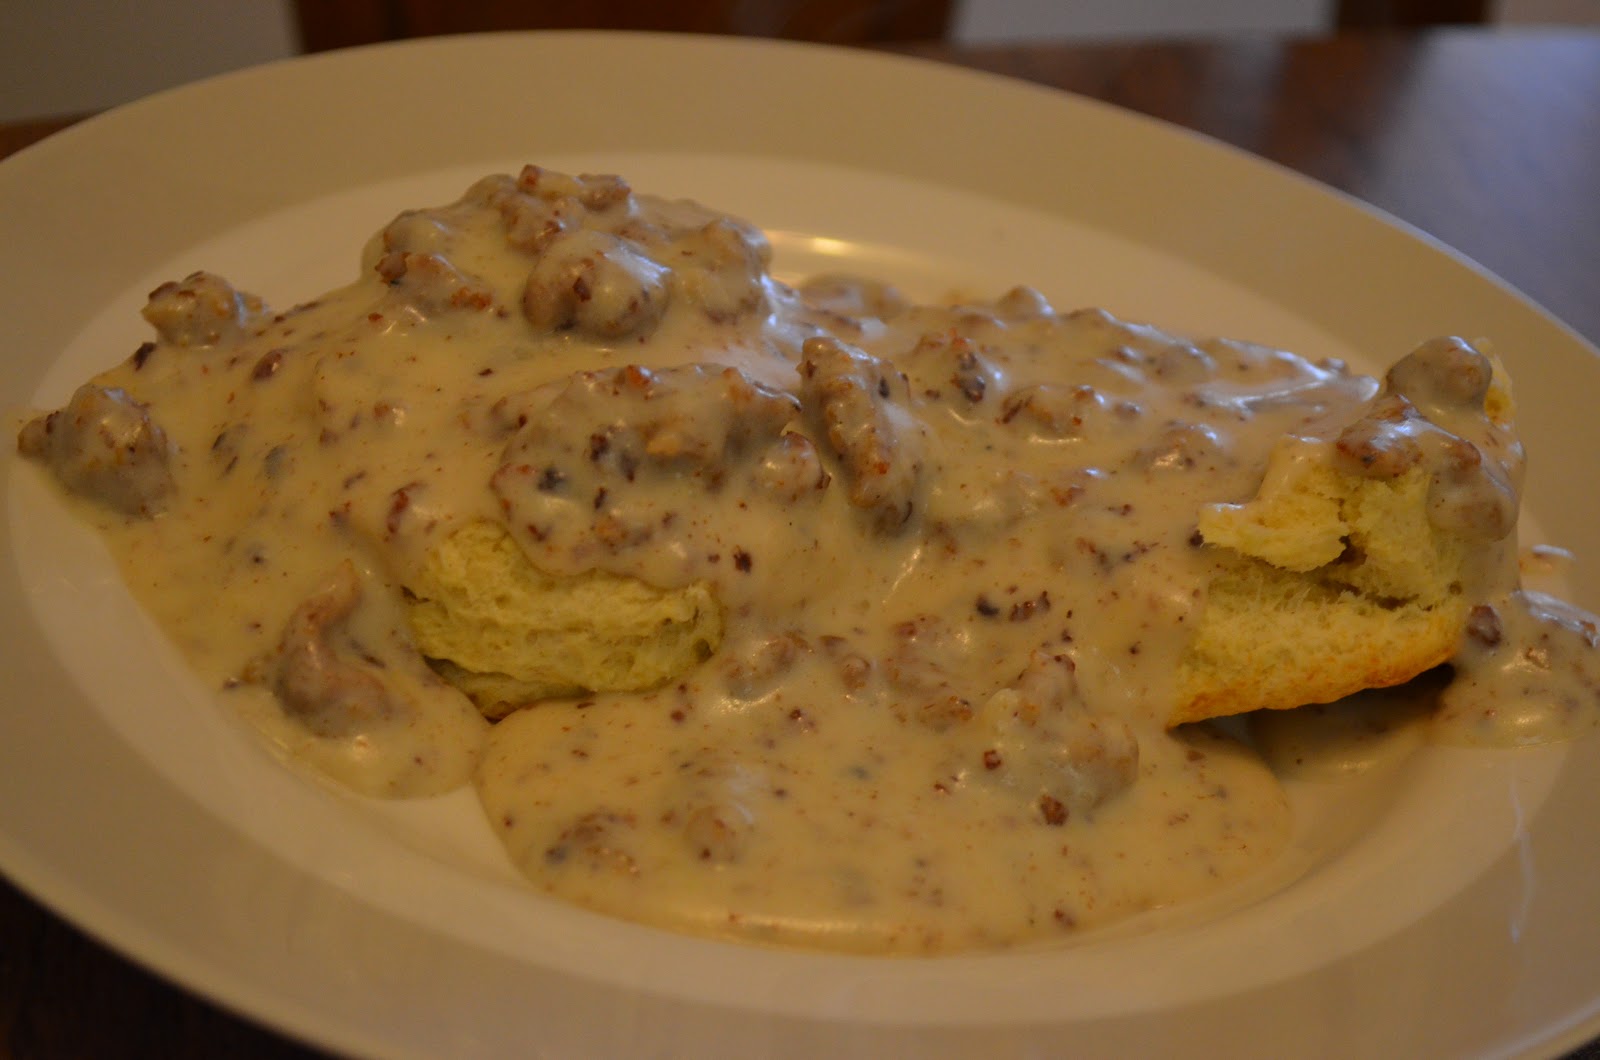 |
| if sausage gravy & biscuits were as good for me as a big salad... i would honestly eat it at least once a week. :) |
Subscribe to:
Posts (Atom)